gryff
-
Posts
1,362 -
Joined
-
Last visited
-
Days Won
15


gryff's Achievements
")
-
 8Observer8 reacted to a post in a topic:
camera clipping planes
8Observer8 reacted to a post in a topic:
camera clipping planes
-
Phuein reacted to a post in a topic:
Why is BJS now mostly Typescript?
-
JackFalcon reacted to a post in a topic:
showing only visible sides + flat shding
-
JackFalcon reacted to a post in a topic:
Mesh visibility of children
-
JackFalcon reacted to a post in a topic:
Mesh visibility of children
-
JackFalcon reacted to a post in a topic:
Setting mesh origin point for movement and scale
-
webGLmmk reacted to a post in a topic:
Web Audio Use with BJS
-
MrVR reacted to a post in a topic:
[SOLVED] - 4 Max Bones Influences Limit
-
JackFalcon reacted to a post in a topic:
Character animation not playing in sandbox
-
JackFalcon reacted to a post in a topic:
blender animation export issue
-
Well I'm not sure how much I can contribute to this thread - but I will try I've been playing with the .glTF format and found that I could load them in the Sandbox - so I thought I would try with @Mythros's .obj files. But first I imported them into Blender and re-exported as a .babylon file. That .babylon file worked fine in the Sandbox. So now I re-exported them from Blender as an .obj file and loaded the .obj file into the Sandbox and I got the result in image 1 (upper) - just the tree trunk. but the materials were present. So I started to make changes. First, in the leaf material, I changed the the value labelled as "alpha" from 0 ->1. The result, I could now see the "leaves" but extraneous stuff filled up all the planes - so no transparency I then scrolled down to the texture that was being used and looked at the "hasAlpha" value - Image 2(upper) which said "false" and changed that to 1. Result - tree was showing fine (Image 2 bottom) I went back to the babylon file I had created and look at the material parameters. {"name":"tree1.Mat17310","id":"tree1.Mat17310","ambient":[0.8,0.8,0.8],"diffuse":[0.64,0.64,0.64],"specular":[0.25,0.25,0.25],"emissive":[0,0,0],"specularPower":50,"alpha":1, "backFaceCulling":true,"checkReadyOnlyOnce":false,"maxSimultaneousLights":4, "diffuseTexture":{"name":"English_Oak_diffuse.png","level":1,"hasAlpha":1,"coordinatesMode":0,"uOffset":0,"vOffset":0,"uScale":1,"vScale":1,"uAng":0,"vAng":0,"wAng":0,"wrapU":1,"wrapV":1,"coordinatesIndex":0}}, NOTE the value for"alpha (line1) and "hasAlpha" (last line). I also tried to load @Mythros's original files into the Sandbox - they did not work. The leaves mesh was visible - but both the trunk and the leaves meshes both had a standard material. The Sandbox seemed to be ignoring the .mtl file. Examining the original .obj file I found this mtllib ./models/deciduous/01/deciduous01/deciduous01.mtl Changing that line to : mtllib deciduous01.mtl and it loaded and behaved just like my .obj export from Blender did. I'm not sure if this helps @RaananW, or @Deltakosh or @Mythros in figuring out the problem. Or did I just add more confusion? cheers, gryff
-
@JCPalmer : Well I watch with interest Jeff. I just tweaked the color spread slider - which did not seem to differentiate between intra/inter to the casual observer. Mind you, can you produce something like this: Hair Streaks As I walk around downtown I see that there are many young ladies into that type of hair coloring cheers, gryff
-
@RelativeNull Well yes they are Compare these two scenes: Jack with Normal map Jack without normal map I deleted the normal texture from just the body - the face still the same in both models. By the way, the black hair has more verts and faces than the whole of the body The body mesh is not very good - no flow to the faces that you would get with lowpoly "box/edge" modelling And you still have issues with the bones and animation - 72 bones is way to many and the IK bones are not connected properly cheers gryff
-
@JCPalmer : Well Jeff it does allow for the adding of er ... " platinum, glitter, wisdom or stress highlights"... that us old folk get cheers, gryff
-
@RelativeNull : thanks for the .blend file:) Now I'm trying to figure out what you mean by " you don't take into account mirrored UV " and what you see as the problem? Here is your character Jack that I exported from Blender but I changed one of the textures to have a green number 2 on the chest. (See image below) Jack Walk towards the character - the image is mirrored. nicely. (I suspect the body and face meshes were created using the mirror modifier. If you don't want the the textures to be mirrored you are going to have to re-uvMap the meshes.) There are other issues though with your model - meshes poking through each other, the ugly shading on parts of the mesh, bones that are not used or set up etc. cheers, gryff
-
resolved cloned skeletons animate incorrectly only on iphone
gryff replied to Baker Xiao's topic in Questions & Answers
@Baker Xiao : As an additional thought it does not work in Firefox on my Windows XP machine (I know, I know). It throws this amongst the errors: #define NUM_BONE_INFLUENCERS 7 #define BonesPerMesh 42 @JCPalmer has explained the max number of bones issue - but the NUM_Bone_Influencers surprised me given the low poly nature of the mesh ( I normally work with 2-3). How was the rigged mesh created? cheers, gryff -
@RelativeNull : yes be helpful to post your .blend file - it almost always is ! Ohh - and ignore @Deltakosh 's comments about me And welcome to the forum! cheers, gryff
-
@Arte : Hi and welcome to the forum First time I used a skybox, I got those kind of behaviours. Try changing the "maxZ value for the camera. PG here Note line 12 that I added. Hope that helps. cheers, gryff
-
@Michael3D : Hi and welcome to the forum. You might want to have a look at this example I created. Walk around in the maze Maze It uses a single point light attached to the camera and two hemi lights to provide up and down "fill" lighting (lighting the floor and ceiling parts). The point light uses a range not "radius" which you tried in your code I notice!! I set the range to 5, the intensity to 3 and diffuseColor to 0.4708,0.477,0.2397. Sometimes it takes a bit of playing around to get exactly what you want. cheers, gryff PS hi @dbawel : good to see you again - I've sent you a PM. gryff
-
solved The mesh lost it's skeleton when exporting from blender to babylon
gryff replied to mak11's topic in Questions & Answers
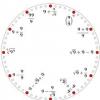
@mak11 : Hi and welcome to the forum Sorry for the slow response - I've been on vacation which will continue for a week or more. (Busy time of the year for me - friends and family reunions/gatherings ) Anyway, I took a look at your wyvern file which I got from OpenGameArt.Org (I hope that is the file you are using.) The issue seems to be one of the animations - "SpotAction". When I load it in the Action Editor I get the mess that is in the image below. I have no idea what it is doing or trying to do ?? It has to be deleted. Here is the process I would use: 1. Create a blank empty file in Blender - just a light (I use a Hemi), a camera looking down the Y-Axis and put the cursor at 0,0,0 (Shift C) 2. Now go File->Append-> and navigate to the file "wyvern.blend" on your computer and select it 3. Now, select Object->wyvern (not the wyvern Armature!) - and click the Append Button. This will add the mesh, armature and one animation (in my case "Hover") Now start adding more animations : 4. File->Append->Action->Fly Repeat for all the animations EXCEPT the "SpotAction" !! Now try exporting . Take a look at the wyvern flying One other thing you should note, in Blender turn on "backfaceculling" and the inside of the wings will disappear in the 3D window. The skin between the ribs of the wings are just one-sided so you will have to turn off back face culling with BJS. with code like this: var theSkin = newScene.getMaterialByName("wyvern1.WyvernSkin"); theSkin.backFaceCulling = false; Hope that helps. cheers, gryff -
@Bricktheworld : Agree with @V!nc3r and @Wingnut - that negative scale is an issue. Go with V!inc3r's suggested methods but let me add a couple of additional suggestions 1. The animations, if they are meant to be applied to just one object rather then instead of, for example, Seat.000Action use Seat.0000-Action. Note the added hyphen. It means that the animation will only be applied to the object named Seat.0000 and you won;'t see this in your .babylon file : "ranges":[{"name":"CanopyInterior.000Action","from":0,"to":3},{"name":"Fuselage.002Action","from":10,"to":13},{"name":"Greeble.001Action","from":20,"to":23},{"name":"Seat.000Action","from":30,"to":33},{"name":"TopWing.000Action","from":40,"to":43}] All animations applied to all objects. 2. And this is a suggestion until you have it solved use a Hemi lamp getting the meshes right will not be complicated by light and dark side of meshes good luck. cheers, gryff
-
@Chrislistens : I gather you still are having problems. Can you post your .babylon file, and if you created the scene at .clara.io can you export it as a .blend file and post that too (if it does not cost you money) cheers, gryff
-
@JCPalmer : Nice Jeff. As for the close up view - a skull cap the same as hair colour, or maybe just a different material on the mesh where the hair is. One day I must look at this QI closely and try and understand it cheers, gryff
-
@Sophie C Thanks for the file She is a big lady!! I will take a look at a couple of possibilities to see how we might fix her. As I said before, the issue is going to be with the translation of the hip bone in the animation. I have a couple of ideas - but no guarantees. cheers, gryff
-
@Chrislistens Hi and welcome to the forum I tested your HTML code with a simple sphere and plane I created with Blender and it worked fine - just changed the script for BJS to one I have on my local server. Did you include a camera and light? If I remove the camera from my Blender scene then it hangs at the line below when I try to load that with your script: newScene.activeCamera.attachControl(canvas); cheers, gryff